wsrp
Setup Instructions
This document walks through step by step the process to run the application on your local machine. Everything needed to install and launch the application is included in this repository.
The application itself is a lightweight banking application, in which a user can log in as a customer or an employee, access account details and view transactions.
The database is a MySQL relational database. The server is a Python Flask application, and the front end uses the Vue.js framework.
[!WARNING] Beacuse of the security vulnerabilities intentionally included in this application, we advise anyone trying it out to do so inside of a virtual machine. We have chosen VirtualBox running an instance of Ubuntu 22.04 as our virtual environment, which is covered in below.
There are four main steps to set up this project in order to interact with it:
- Set up virtual environment
- Create and run database instance
- Set up Flask server
- Set up Vue.js front end
These steps should be completed in order.
1. Virtual Environment
Install VirtualBox
Oracle VirtualBox is a free tool that lets you run virtual machines (VMs) on your computer. You’ll need it to create a separate, controlled environment for this project.
- Download and install VirtualBox from:
🔗 https://www.virtualbox.org/
Install Ubuntu 22.04 LTS (Virtual Machine)
🖥 What is Ubuntu & Why are We Using It?
Ubuntu is a popular, free Linux-based operating system. We use it because it provides a secure and consistent development environment that closely resembles real-world web servers.
To set up an Ubuntu virtual machine (VM):
- Download Ubuntu 22.04 LTS (or later) from:
🔗 https://releases.ubuntu.com/jammy/ - Open VirtualBox, click New, and:
- Name:
Ubuntu 22.04or current - Type:
Linux - Version:
Ubuntu (64-bit)or appropriate option for your machine - Memory: At least ??GB RAM (recommended)
- Storage: At least ??GB+ dynamically allocated disk
- Name:
- Attach the Ubuntu ISO and install it inside the VM.
- Once installed, log into Ubuntu and open a terminal .
Install Required Packages
Inside the Ubuntu terminal, run:
sudo apt update && sudo apt install git python3.10-venv curl -y
git→ Needed to clone the project repository.python3.10-venv→ Creates an isolated Python environment.curl→ Fetches files from the web.
Clone This Repository
Once Ubuntu is set up, clone the project into your virtual environment:
git clone https://github.com/ted-miller92/wsrp.git
cd wsrp
2. Database
Install MySQL:
wget https://dev.mysql.com/get/mysql-apt-config_0.8.33-1_all.deb
sudo dpkg -i mysql-apt-config_0.8.33-1_all.deb
sudo apt update
sudo apt install mysql-server
Choose a memorable password for the root user.
Start MySQL and enter the password you just created:
mysql -u root -p
Create the database with the script, then exit MySQL:
source database_setup_v0.sql;
exit;
3. Server
Navigate to the server directory with cd server.
Create a python virtual environment, then activate it:
python3 -m venv server_env
source server_env/bin/activate
Install the required packagegs and then run the app:
pip install -r requirements.txt
flask --app server.py run
At this point you should be able to access the API endpoints in the browser.
4. Front End
Navigate to the wsrp_vue directory.
Vue.js runs on Node. We will use Node Version Manager (nvm) to install Node.
curl -o- https://raw.githubusercontent.com/nvm-sh/nvm/v0.40.1/install.sh | bash
Verify version:
nvm --version
Should show the version specified in the curl command above. Now install Node:
nvm install node
The latest version will be installed. Double check that you are in the wsrp_vue directory then install dependencies:
npm install
Run the front end server:
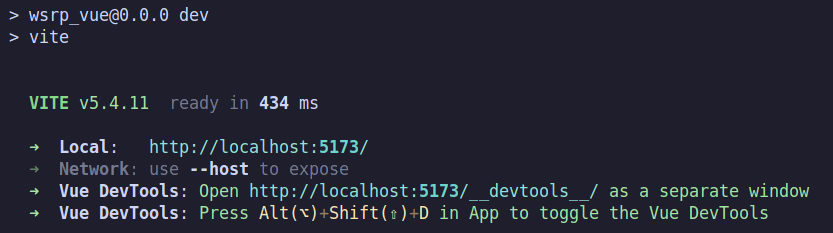
npm run dev
You should now be able to access the application at the URL printed in the terminal.
Wrapping up
Now you should be able to access the application at the URL printed in the terminal.
Continue to the Exploration Guide to start hacking!